Quality Inspection ReportSpecifying MINIMUM requirements for Quality Inspection and Certification
- November 15, 2019
- Posted by: Rajneesh-Kumar
- Category: Business Process

Quality Inspection Report is a very simple yet very powerful document to certify the quality of the parts. It is simple because it is based on common sense only. And Powerful because it has a record of each and everything which the customer has requested.
Here we are talking about basic requirements only. The requirements can go up to the full PPAP (Product Part Approval Process) report.
Please e-mail us for a clear copy of the Ballooned drawing and Inspection report.
1. Ballooned Drawing
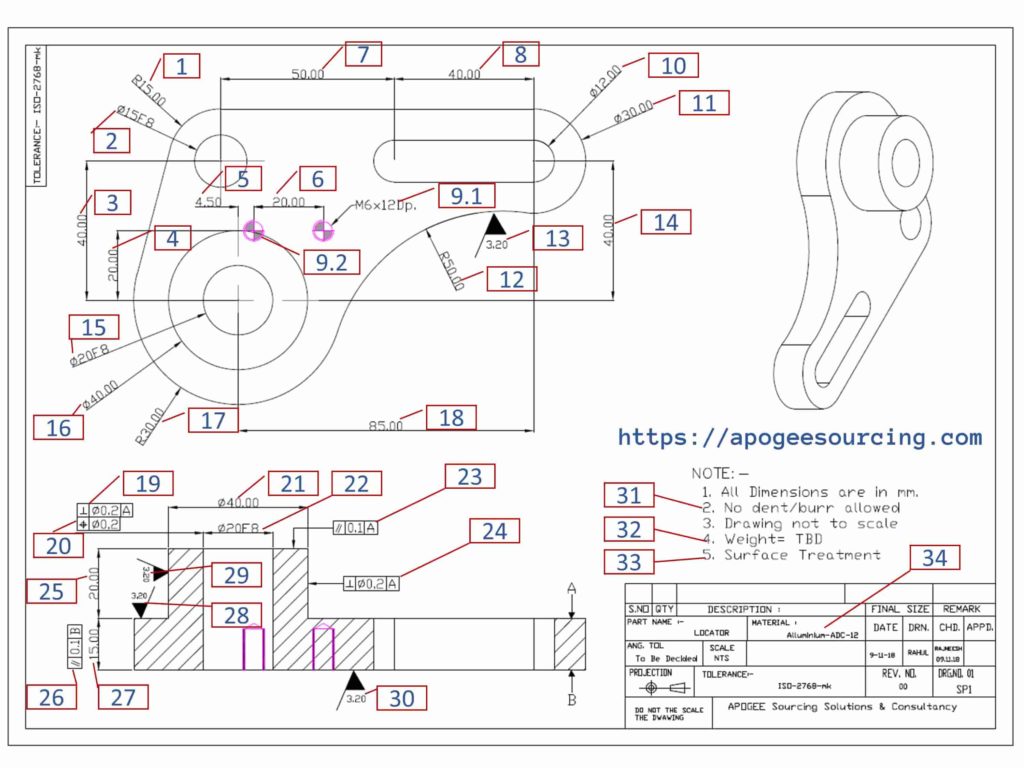
The first step for Quality Inspection Report is to put a balloon on each value. The balloon should be put on each measurable parameter. The normal practice to put a balloon is in the serial number and start putting it from the top left corner.
Below you will see an example of ballooned drawing. The red boxes, containing serial numbers 1, 2, 3…33, 34 are termed as Balloon here.
2. Preparing Quality Inspection Report
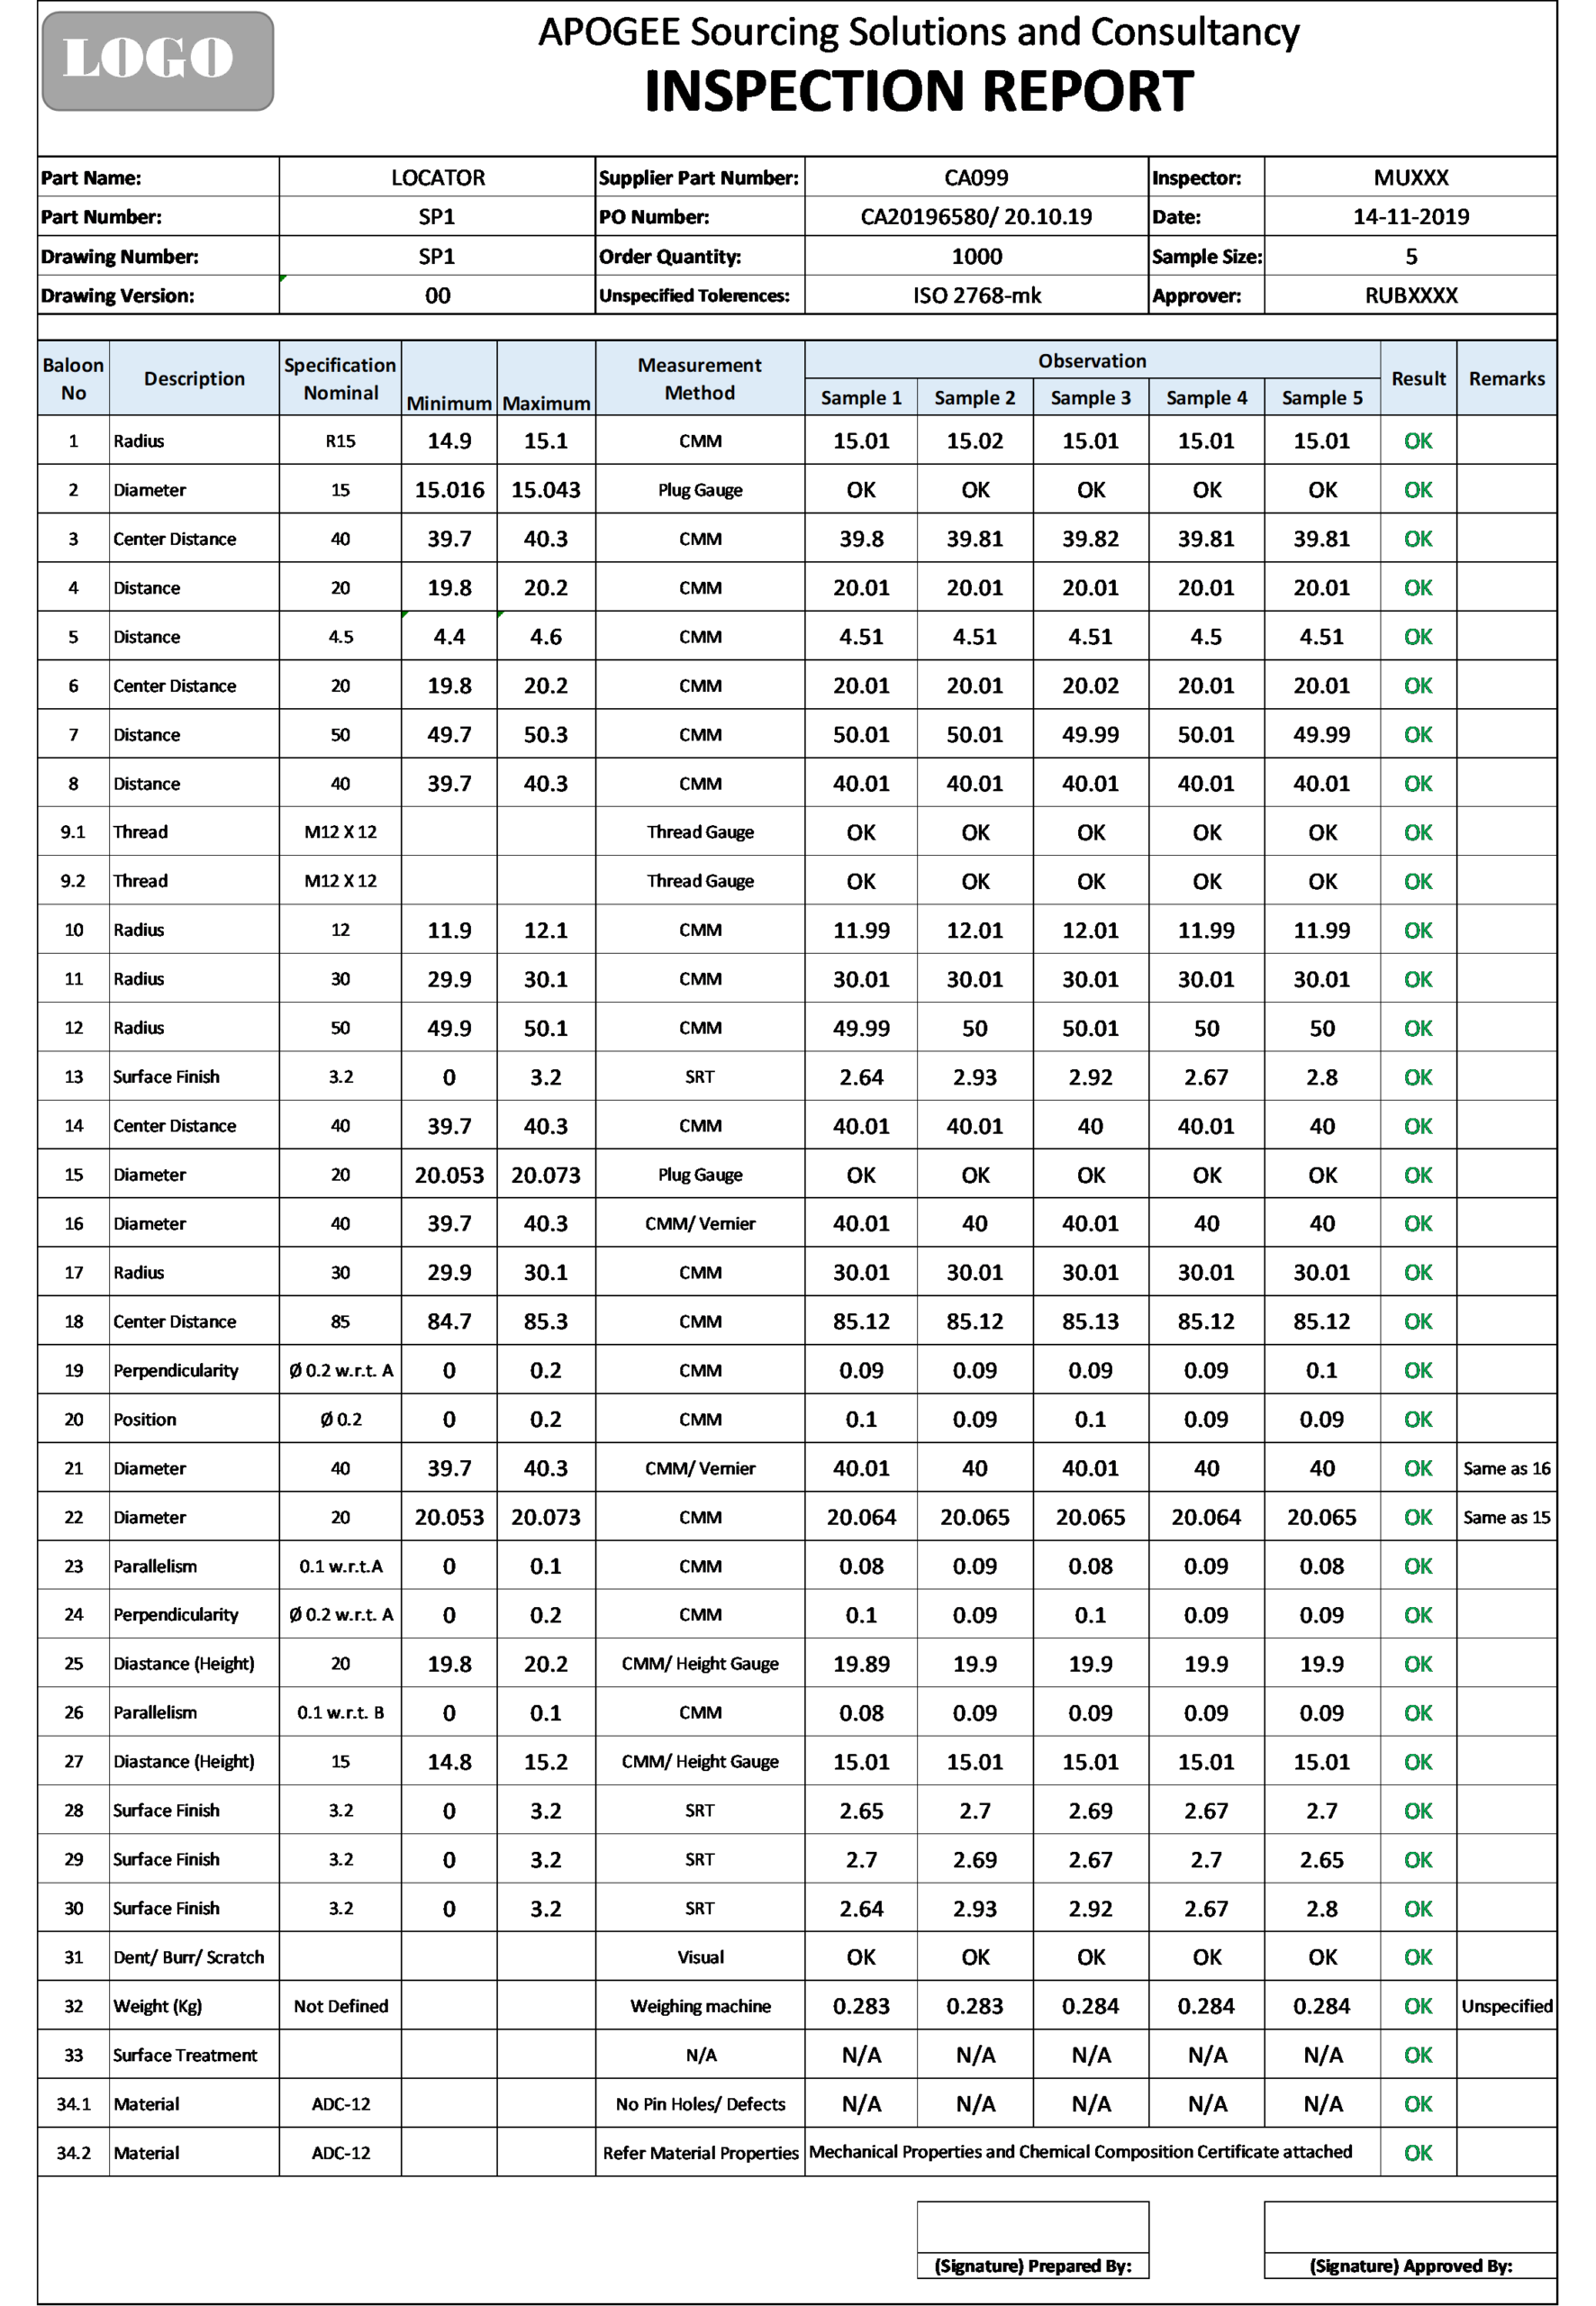
The next step for preparing a Quality Inspection report are as follows:
- Decide the method of measurement – CMM, Vernier Caliper, Height Gauge, Special Gauges, etc
- Note down the Nominal Dimension and Tolerance – It is very normal these days that the drawing doesn’t mention tolerances on individual dimension. But specify the tolerance standard, like ISO 2768-mk, CT9 for castings, etc.
- Decide what will be sample size? – Standard, ISO 2859 – 1: 1998 – General Inspection Level may appear beneficial in this case.
- Check the instruments are OK and calibrated.
- Measure and start recording the values to complete the Quality Inspection Report.
An example of Quality Inspection Report is shown below:
The 2 pages: Ballooned Drawing and Inspection Report are very basic requirements, along-with Material Test Report. However, sometimes there are customer specified requirements also which need to be included like packaging, process controls, etc.
3. What are the benefits of Pre-Dispatch Inspection?
Pre Dispatch Inspection or Pre Shipment Inspection avoids many future surprises.
- It assures Supplier & buyer about the condition of goods, just before dispatch.
- It clarifies customer if the damage/defect has caused during transit or manufacturing. If the real cause is known, the right action can be taken.
- If the Pre-Dispatch Inspection has been done jointly, the results shown in the report are owned by both parties.
Inspection and Audit
Factory Audit for supplier selection or Getting your goods inspected before dispatch or in-process audits during manufacturing, Warranty Analysis etc. – all in our Inspection & Audit service.


