- February 20, 2024
- Posted by: Rajneesh-Kumar
- Category: Business Process, Manufacturing in India
What is my product’s ideal cost in India?
Imagine an original equipment manufacturer (OEM) that is based outside of India. He wishes to begin sourcing from India.
Their initial concerns are likely to be as follows:
- I want to know my product’s ideal cost in India.
- If I make more money by sourcing from India?
- Is it cheaper to source from India? I want to first do a cost benchmarking of my product.
The answer to these questions can be determined by gathering and analyzing factual information.
We should tear down the product and then do a zero-based costing of all BOM components.
At APOGEE, we do this service to global small and medium-sized OEMs. Know the projects that we have delivered.
Introduction
In this article, I will explain the following:
- the complete process of product costing or BOM Costing;
- the time it takes, and;
- our charges for this service.
Before we move ahead, we can’t disclose client-specific products or information because of NDA. Therefore we have figured out a way.
The product we’ve selected is called ‘Roll Up Standee’ or ‘Standee’.
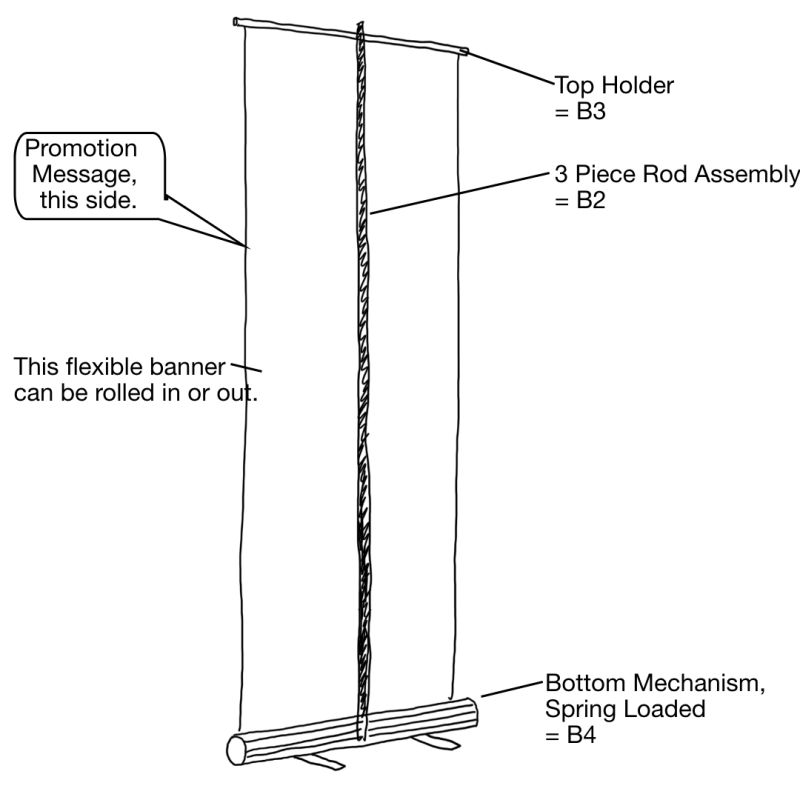
You have probably encountered a standee when moving into a market or retail centre. The sketch above explains the product.
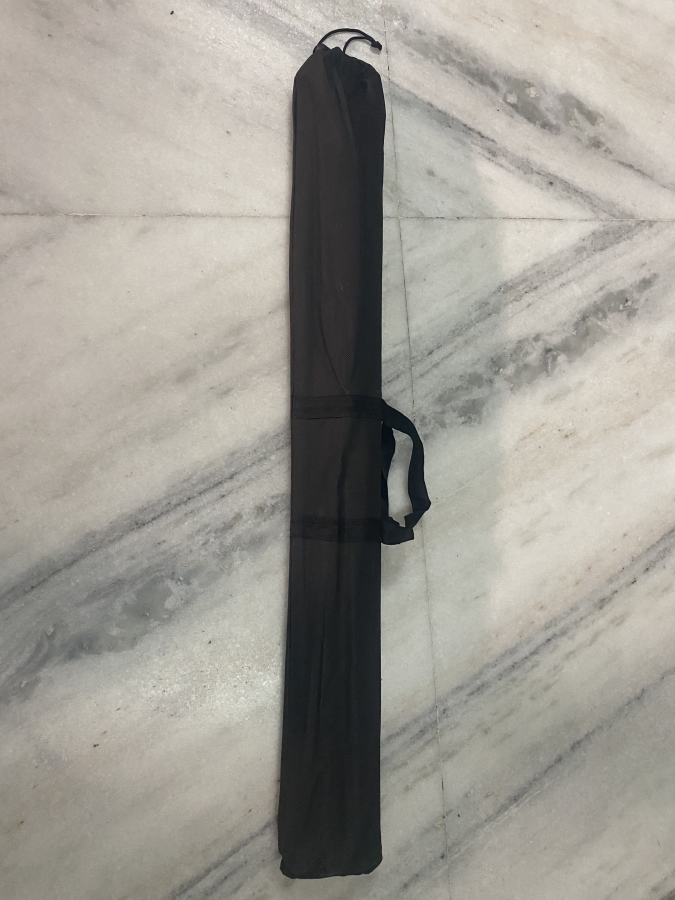
We purchased a standee from Amazon for our study. Here is what we received.
Tearing Down
The first step that we performed was tearing down the assembly.
During this, we understand the parent-child relationship of the assembly and finally prepare a bill-of-materials (BOM).
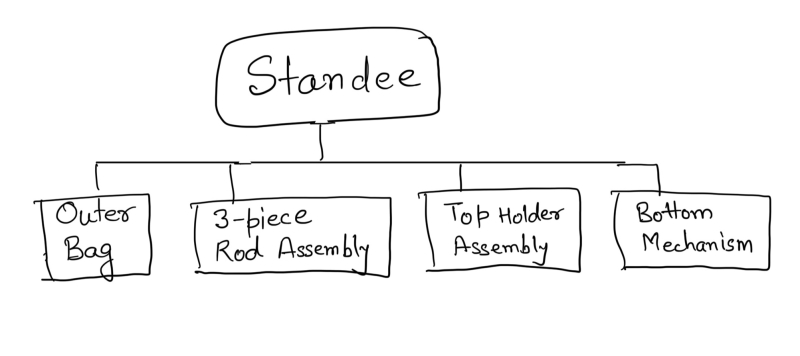
When we opened the above black bag we got 4 sub-assemblies, as follows:
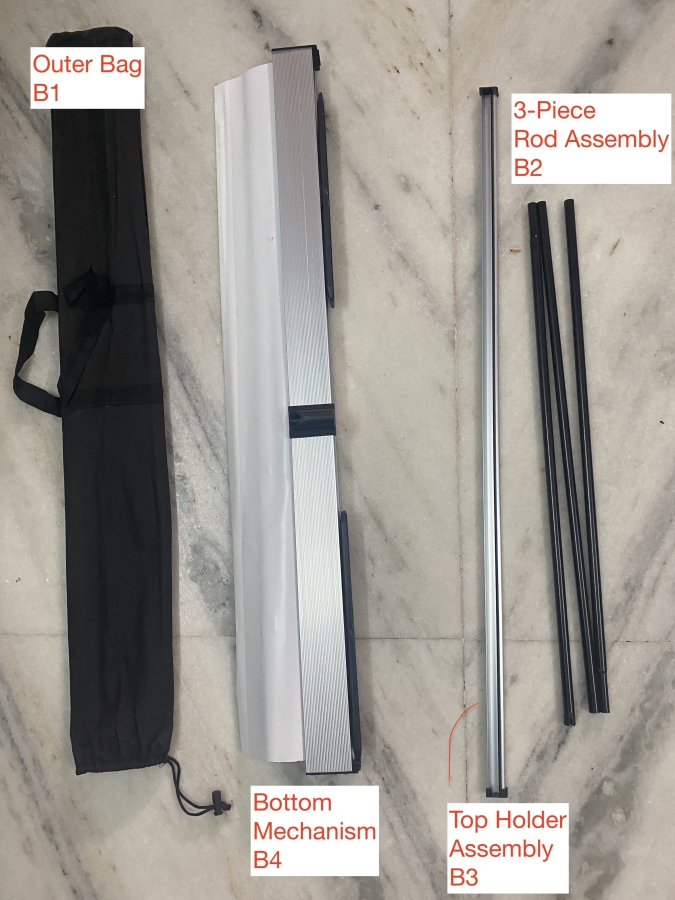
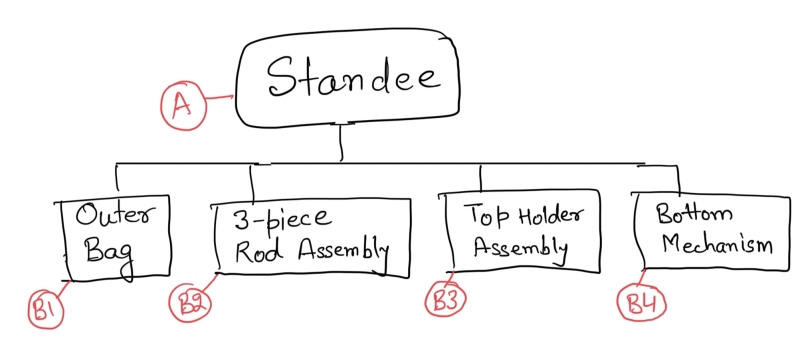
Standee is the final assembly, let’s call it A. The 4 pieces that come out from Standee are:
- Outer Bag – let’s call it B1
- 3-Piece Rod Assembly – let’s call it B2
- Top Holder Assembly – Let’s call it B3, and;
- Bottom Mechanism – let’s call it B4
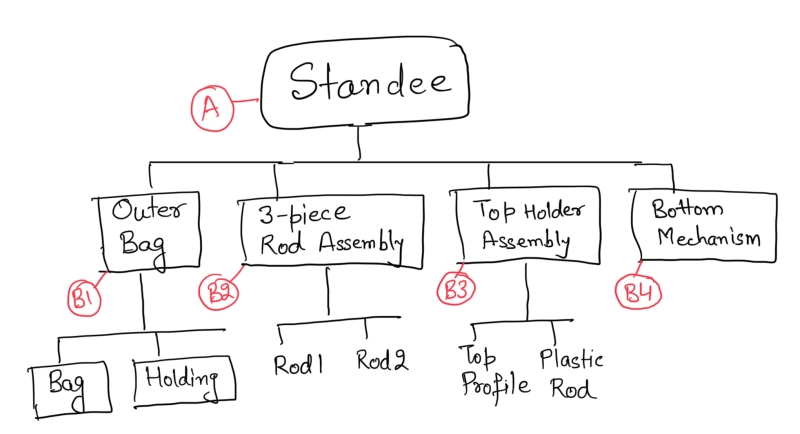
Once again, I explain the parent-child relationship by following four sketches:
Sketch 1: The 4 sub-assemblies and their relationship with the final product.
Sketch 2: Naming the final assembly (as A) and the four sub-assemblies as B1, B2, B3 & B4.
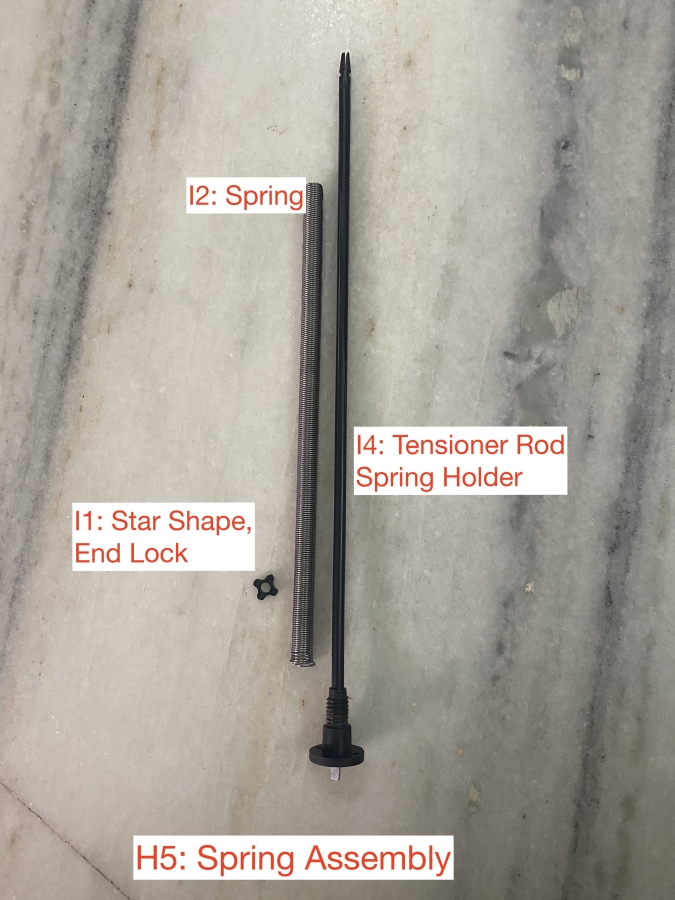
Sketch 3: Further tearing down each sub-assembly. The outer bag consists of a Bag, Holding and more parts.
Sketch 4: Naming each part at the third level. C1, C2 and so on. Then D1, D2 and so on.
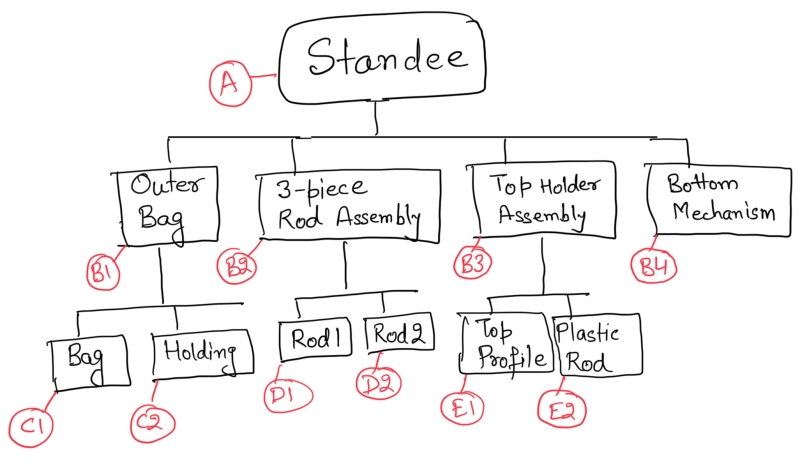
We kept tearing it down. Some more details to explain the process.
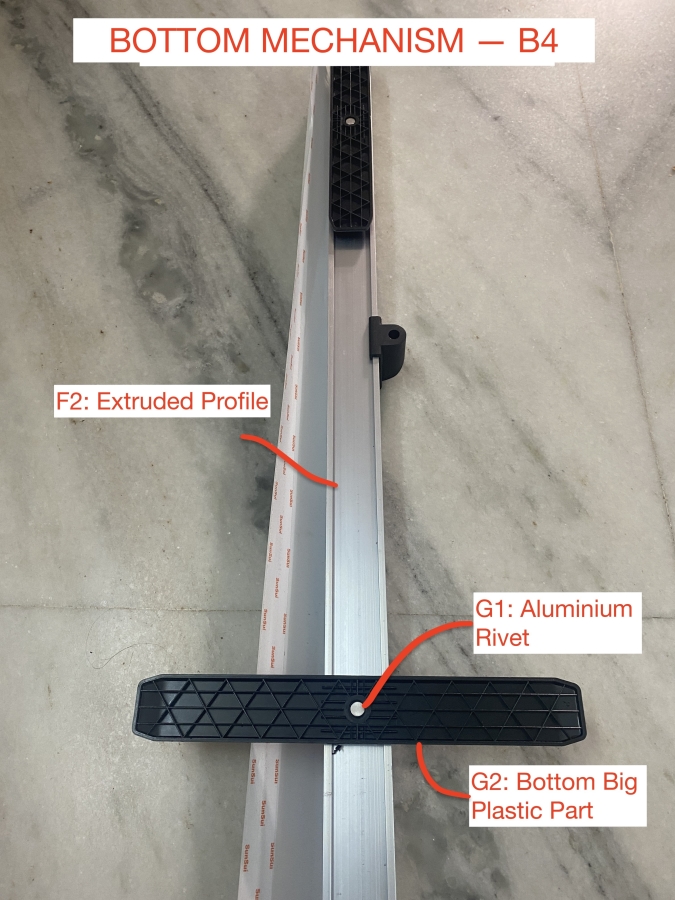
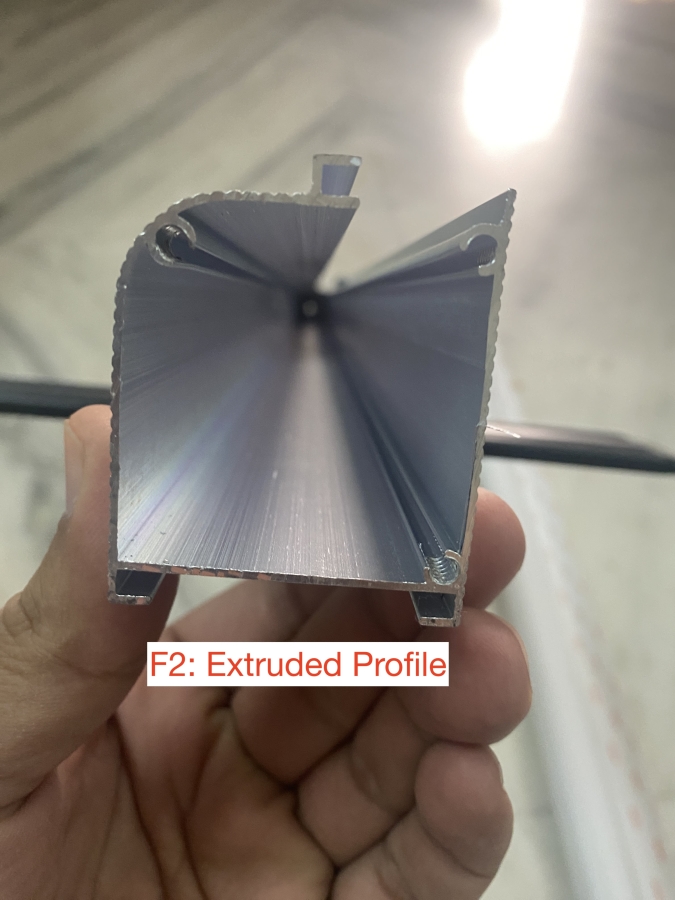
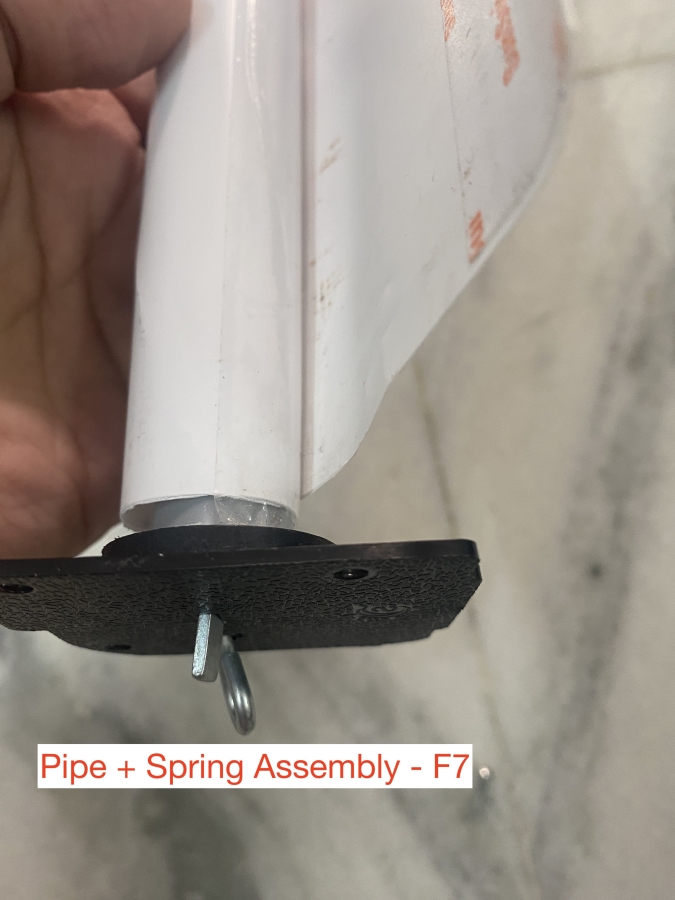
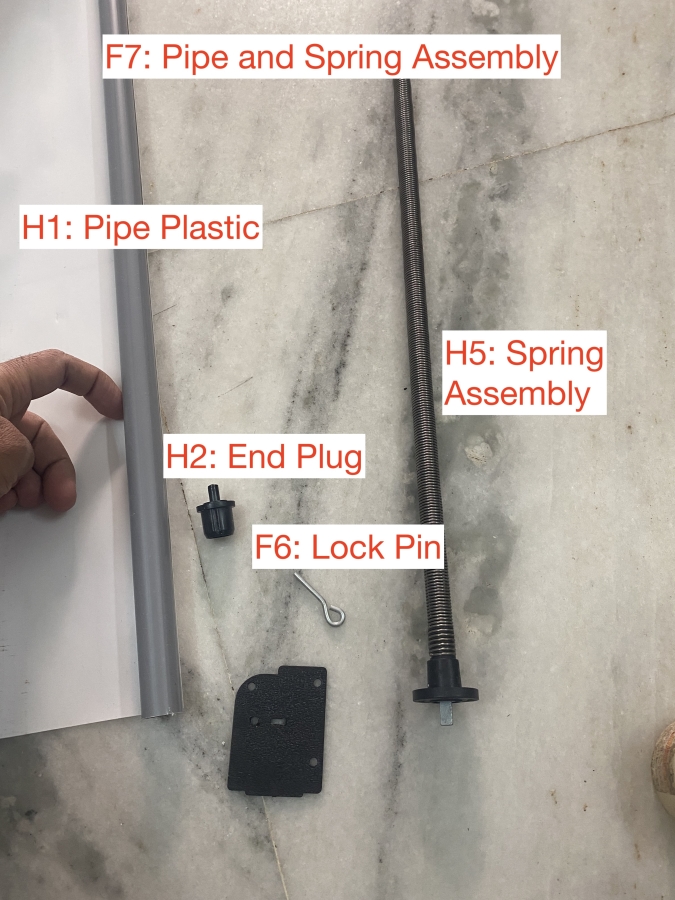
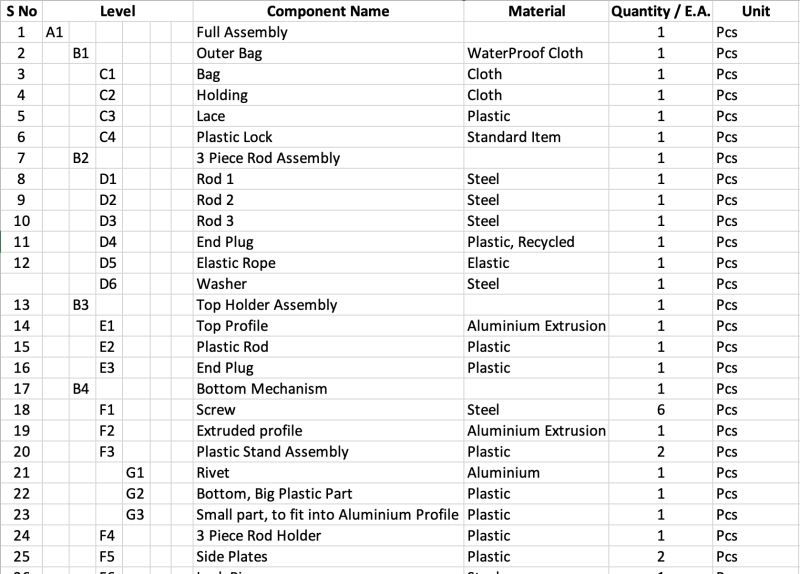
BOM: Bill of Materials:
Finally, we prepared a Bill of Materials (BOM) in MS Excel.
The main details are
- Material and
- Quantity / E.A. (Each Assembly).
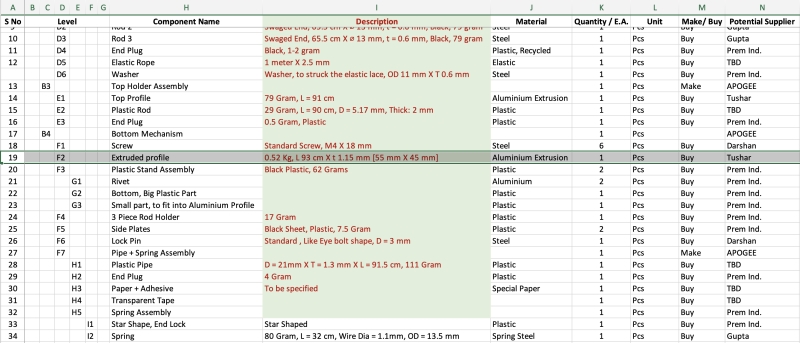
Here is a snapshot of our BOM.
This step concludes here. Now, we move to the next step.
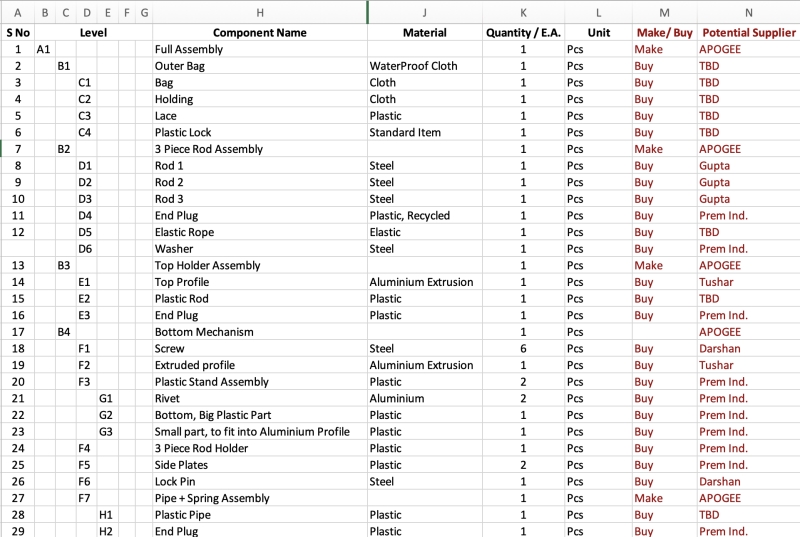
Deciding Make or Buy:
Although the customer shall take the call, for our study we decided the make or buy against each component.
We also decided on the potential supplier for each component. You will see the details in columns M and N.
Then we move to the next step, which is:
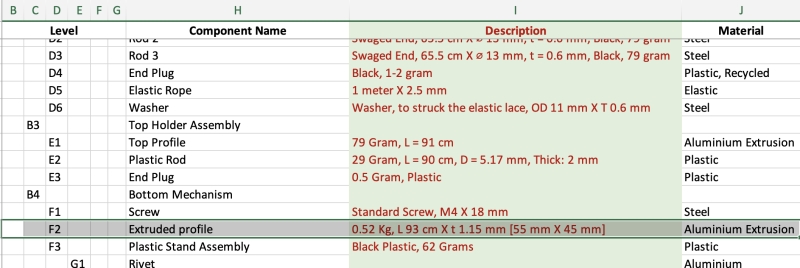
Studying details of each component:
We inserted one column and recorded the description of each component.
Let me give you an example of F7: Extruded Profile.
- The raw material is aluminium.
- The base manufacturing process would be Aluminium Extrusion
- We recorded the weight, dimension and thickness of the profile.
- One piece/ assembly
- The potential supplier is Tushar.
We continued the same for all the components.
See the snapshot:
Ideal Cost of My Product in India:
We shall continue with our example of F2: Extruded profile.
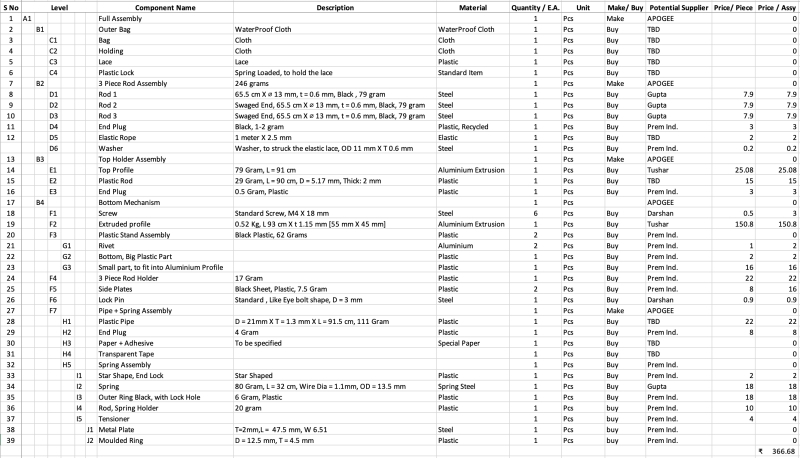
Based on market rates, we have estimated the ‘should-cost’ of each component. For the extruded profile component, we know its weight and the market rate of aluminium.
- For extrusion, the market rate varies from Rs 50/Kg to Rs 70/Kg.
- Now it’s simple to get the cost of this part: (Weight +cutting loss) X (Raw Material market rate + extrusion price) + transportation till assembly spot.
Each component was studied individually and we estimated the should cost, of each component.
We continued this way and finally, we arrived at the BOM cost.
Although we missed a few components (cloth etc.). I think that’s OK.
This completes the BOM costing.
Let’s revise our objectives:
- The complete process of product costing or BOM Costing; — DONE
- the time it takes, and; — PENDING
- our charges for this service. — PENDING
Let’s complete steps 2 and 3 now.
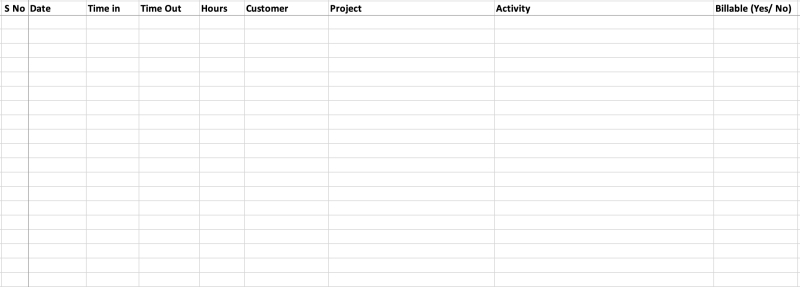
To calculate the time spent on this project, each member made a simple time-sheet. I’ve hidden the details as some are too specific to disclose.
We spent 69 hours working on this project. See the snapshot below:
12+35+20+2 = 69 Hours
L4: Professional with 20 years of experience.
L3: 10 years experience
L2: up to 5 years of experience
L1: Fresher, billed at 0 €/hour
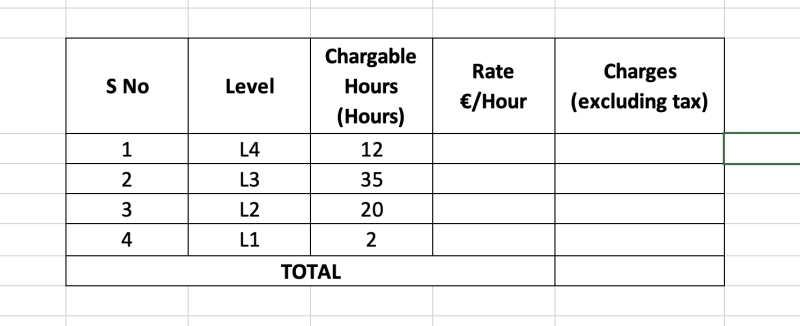
And here is how we should have charged the client for this project.
= Chargeable hours X Rate (as per level).
Now, for our rates/hours at different levels, you may book a 30-minute online meeting with me.
Thank you very much for reading. I look forward to your comments and sharing this in your network.
Know the Author:


Thank you for sharing your thoughts. I really appreciate your efforts and I will be waiting for your
further post thanks once again.